療器械有限公司")
|
News Detail
MIO - Compression plate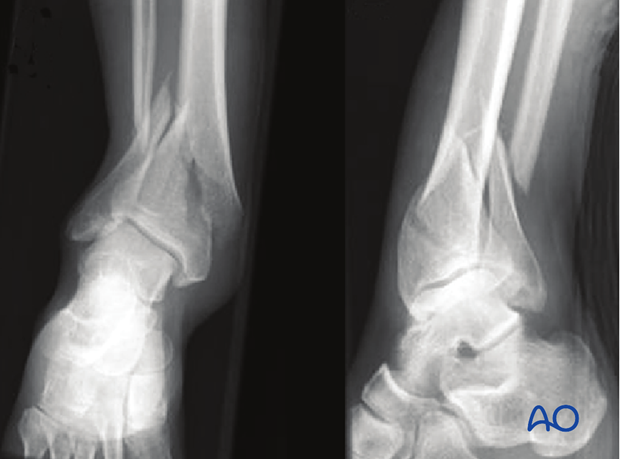 1. General considerations Principles The soft-tissue conditions usually dictate the choice of procedure: early single-stage or multiple-stage surgery. When the soft tissue damage is minimal, acute single stage MIO stabilization is appropriate.
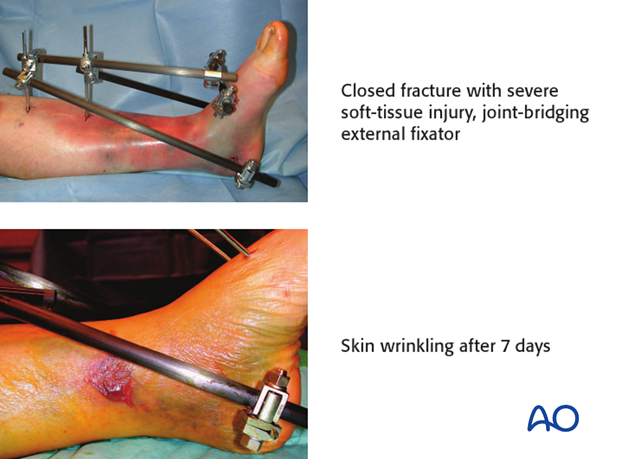
Displaced fractures with minimal, closed soft-tissue injury (Tscherne classification, closed fracture grade 0, rarely grade 1) These injuries may be reduced and fixed primarily, as a single stage procedure, if the soft tissues are in truly excellent condition. A distractor or external fixator may help reduction. Fibular reduction and fixation is the usual next step, but this reduction must be accurate, so that it does not prevent tibial reduction. Finally, the tibial plate is introduced with MIO technique and final reduction of length, alignment and rotation is achieved. Grossly displaced fractures and/or fractures with severe, closed soft-tissue injury (Tscherne classification, closed fracture grade 2 or 3) It is generally advisable to proceed in two or more stages: Closed reduction and joint bridging external fixation Definitive MIO reconstruction after 5-10 days (wait for the appearance of skin wrinkles)
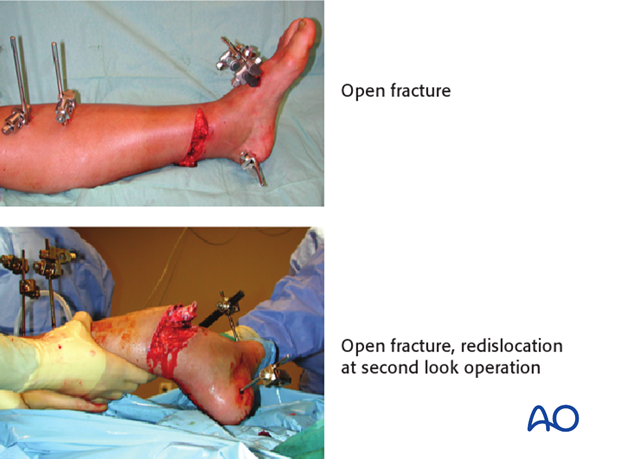
Open distal tibial fractures In the rare situation where there is an open fracture through which a plate can be applied without significant further dissection, please refer to the procedure of open reduction and plate fixation. Typically, definitive fracture stabilization should be delayed, until the time of definitive soft-tissue coverage. This management includes several stages: Emergency management: Wound debridement and lavage. Joint-bridging external fixation and stabilization of the fibula (if needed and soft tissues allow). Where possible, closure or coverage of any opening into the joint should be achieved. After 48 hours: Plan soft-tissue coverage (local or free flap). Definitive stabilization at the time of soft-tissue coverage.
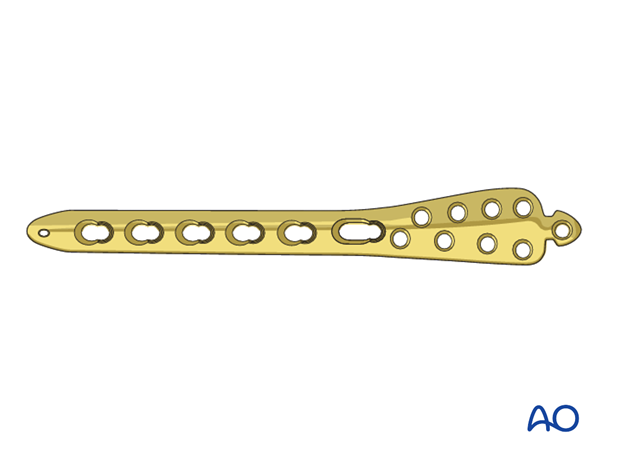
Teaching videos AO teaching video: Distal Tibia - Percutaneous Plating - LCP Distal Tibia Plate AO teaching video - Webcast: Minimally invasive plate osteosynthesis (MIO) of the distal tibia fracture 2. Fibula or tibia first? Sequence of bone stabilization Introduction If the fibula is fractured, it usually needs to be stabilized. Simple fractures of the fibula This is usually addressed first with open anatomic reduction and plate fixation. Alternatively, for transverse fractures, consider a small diameter, flexible intramedullary nail. Fibular reduction helps realign the tibia fracture. Multifragmentary fractures of the fibula Some fibular fractures are complex, and reduction may be difficult. Any malreduction of the fibula will impede anatomic reconstruction of the tibia. In this situation , fibular ORIF is better performed after the tibia has been fixed. The syndesmotic ligaments are usually intact, so gross realignment of the fibula occurs with reduction and fixation of the tibia. For comminuted fibular fractures a MIO technique with a long bridging plate, or intramedullary fixation of the fibula with a small diameter, flexible nail is easily achieved after tibial reduction and fixation. Fibular nailing is particularly applicable if the soft-tissue injury or complexity of the fracture makes extensive exposure for internal fixation hazardous. 3. Preoperative planning Preoperative planning is an essential part of treatment of all distal tibial fractures. It consists of: Careful study of the x-rays Drawing of both the fracture fragments and the desired end result (often indicated by a reversed tracing of the intact opposite tibia) Consideration of intraoperative reduction techniques, including switching to open reduction in case indirect reduction is unsuccessful Choice of implants Reduction can be achieved by ligamentotaxis alone with indirect manipulation. Direct exposure is therefore not often necessary. The shape of the implant serves as a reduction tool. A properly contoured plate applied according to a good preoperative plan improves your chances of a good reduction. Implant choice With MIO plate constructs it is preferable to choose an implant as long as possible for the widest distribution of load at the fracture site. A variety of precontoured distal tibial plates are available.
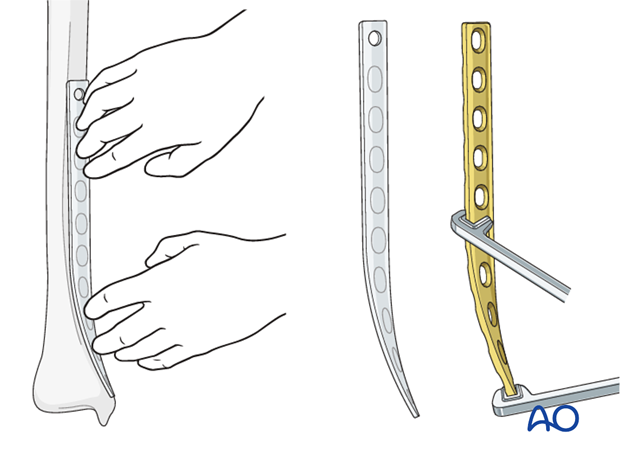
Plate contouring If a precontoured implant is not available, it is important to precontour the plate prior to insertion. A 3.5 or occasionally 4.5 mm standard or locking plate (LC-DCP or LCP) can often be used, but distal purchase may be compromised without a specially designed plate. For distal fractures and osteoporosis, locking head screws (LHS) may be more stable distally. A non-contoured plate can be shaped prior to sterilization, using a sawbones model as a template. Determine the length of the plate from preoperative x-rays. The most distal 8-12 cm of the plate must be bent to form a concave arc with a radius of curvature of about 20 cm and twisted to fit the distal tibia. As illustrated, the medial tibia is internally rotated distally (20 degrees) and lies closer to the sagittal plane.
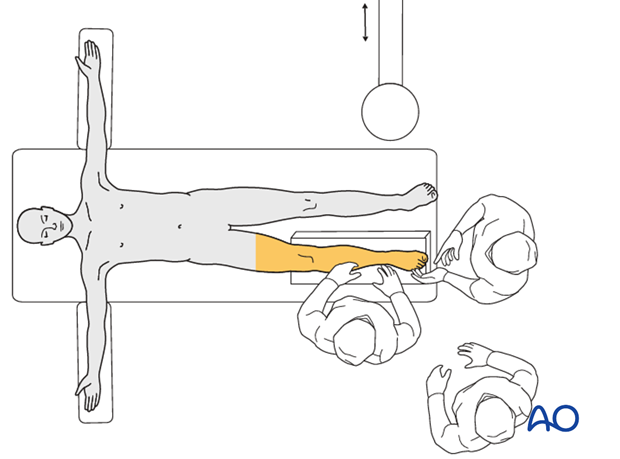
4. Patient preparation and approach Patient preparation This procedure is normally performed with the patient in a
Approach For this procedure a
5. Preliminary reduction Indirect reduction with a distractor An appropriately positioned distractor or external fixator can be a very helpful tool for reduction, especially for length and rotation. Medial positioning allows subcutaneous access to the tibia. A laterally based distractor requires a pin through the anterior muscular compartment but provides more efficient distraction of any associated fibular fracture, and correction of valgus deformities. Distraction can be used for the open reduction and plate fixation of the fibula as first step (if not already fixed) and for the reduction of the tibia as a second stage after previous fibular stabilization. Schanz screws are positioned in The final reduction occurs during plate application.
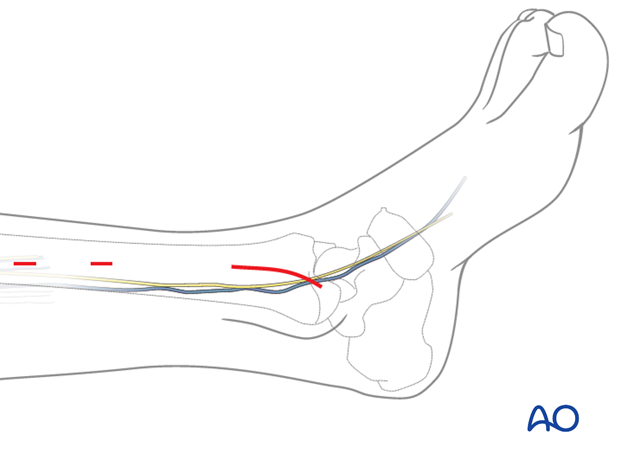
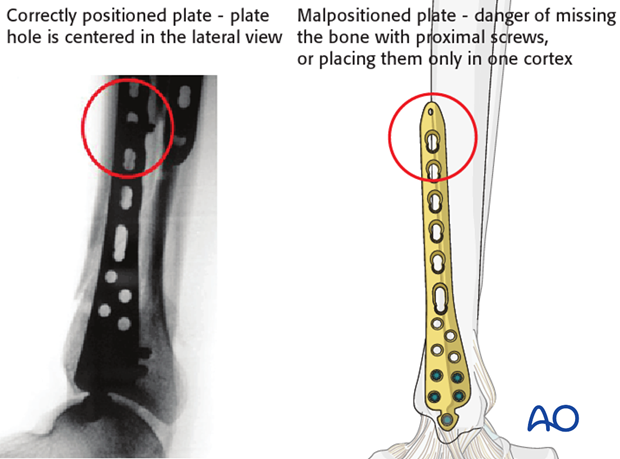
6. Plate insertion and final reduction Insertion of the plate Tibial length and rotation are restored indirectly with distractor or external fixation. Angulation may be approximated in the same way but is definitively corrected by plate application. The plate is inserted after proximal tunneling with a blunt instrument. Depending on the fracture situation, the plate is usually positioned on the anteromedial aspect of the tibia. Proximally, above the fracture zone, a small incision (2-3 cm) will aid plate positioning. It is important that the plate and proximal screw be centered on the tibia, particularly if locking head screws (LHS) are planned.
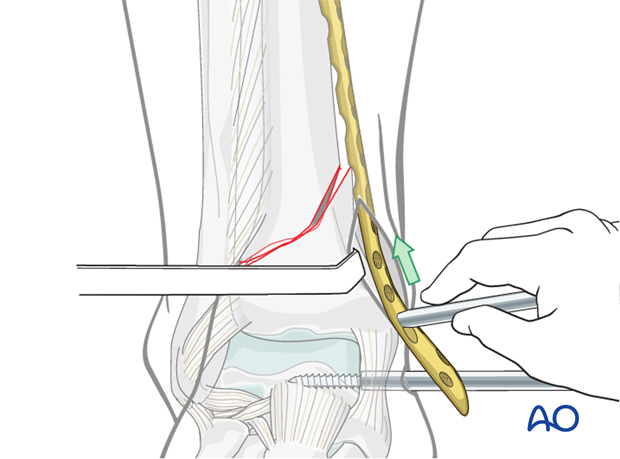
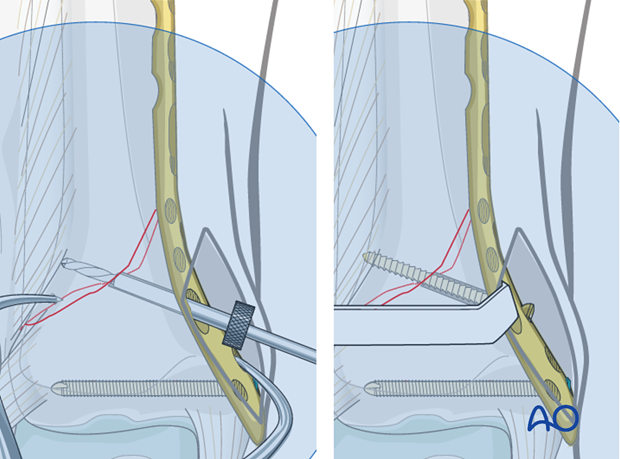
7. Preliminary plate stabilization Temporary fixation can be performed with K-wires through the screw holes (or inserted drill sleeves) to approximate the final plate position before screw insertion. Once accurate position of the plate has been achieved, a conventional screw is inserted in one of the most distal plate holes and fixed. Alternatively, the plate can be manually pressed to the bone, allowing the insertion of a locking head screw (LHS) instead of the conventional screw. It is crucial that the plate is positioned close to the bone, especially at the supramalleolar level, to prevent soft-tissue irritation by the plate.
Pitfall - Malpositioning of the plate If the plate is not positioned correctly, there is a danger of missing the bone with proximal screws or placing them only in one cortex.
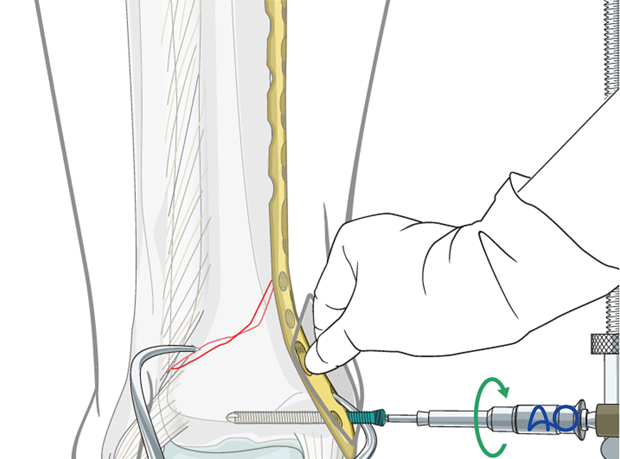
8. Applying compression Interfragmentary compression with a lag screw For spiral and short oblique fracture patterns that are anatomically reduced, it is possible to insert a lag screw through the plate to enhance the overall construct stability. It is possible to apply this screw in a percutaneous fashion under image intensifier control. Alternatively, depending on the fracture plane, the lag screw can be inserted outside the plate. Note:
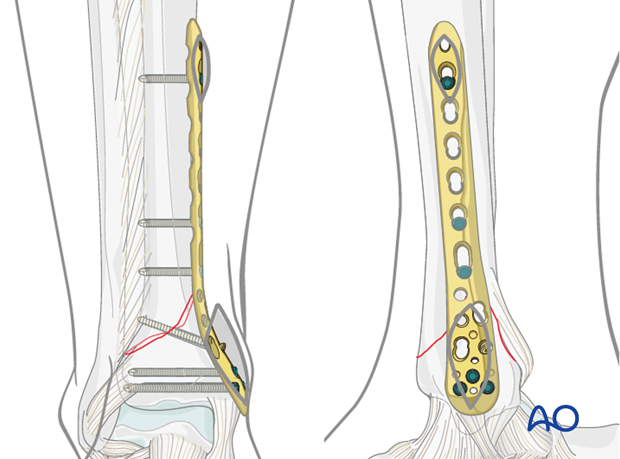
Compression with plate tension For transverse fractures, it is necessary to add a subtle convex prebend to the implant at the fracture level, to ensure that the opposite side of the fracture remains compressed. Fracture compression is achieved by applying tension with the plate, using eccentric placement of screws in non-locking holes, or an external tension device. 9. Definitive plate fixation Accurate screw positioning Further proximal and distal screw insertion is completed. The number and position of the screws inserted is dependent on the individual fracture pattern and bone quality. The goal is “balanced fixation”. This means roughly equivalent fixation strength in both proximal and distal segments. Usually, the metaphysis requires more screws (3-5) than the diaphysis (2-3). In osteoporotic bone, the number of screws should be increased on both sides of the fracture. Locking head screws (LHS) may improve fixation in osteoporotic bone and short periarticular segments.
Wound closure Atraumatic skin sutures are used for closure of screw insertion wounds. Occasionally, additional deeper sutures are needed for distal and proximal incisions. 10. Final assessment The x-ray imaging at the end of the operation confirms the anatomical restoration of length, alignment and rotation (for further information see the content on It is important to check with imaging in both planes that a previously unrecognized split into the articular surface has not been displaced during this procedure. Additional fixation of such a fracture line may be required. 11. Aftercare following plating Leg elevation is recommended for the first 2-5 postoperative days. Physiotherapy with active assisted exercises is started immediately after operation. Immobilization is not necessary. Mobilization Follow up Implant removal
|


Shanghai Carefix Medical Instrument Co., Ltd.China
滬ICP備16042301號-1 (滬)-非經(jīng)營性-2016-0122 滬食藥監(jiān)械生產(chǎn)許20101725號
